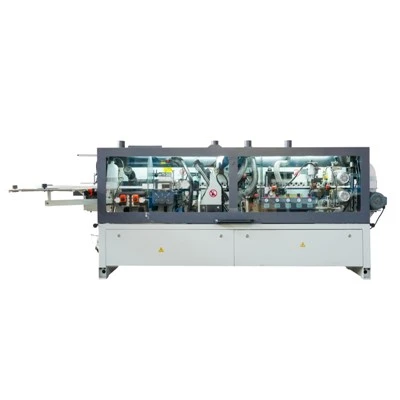
If you’re running a woodworking shop, furniture factory, or cabinet manufacturing line, you know that dialing in the right spindle speed on your equipment makes all the difference—especially when you’re working with a multi-sided machine like a six sided drilling machine. I’ve been on the supply end of these machines for years, chatting with shop owners and operators who test, tweak, and troubleshoot speed settings every single day. A lot of folks skip the small, intentional steps of adjusting spindle speed properly, and end up dealing with burn marks on wood, splintered holes, or even premature wear on their machine bits. Today, I’m breaking down exactly how to adjust that speed correctly, with real, hands-on tips that work for every project you throw at it.
First, let’s get clear on why spindle speed matters for a six sided drilling machine, and how it’s different from a single-sided drill. Unlike a regular drill that works on one side of a workpiece, a six sided machine bores holes on all six faces—top, bottom, front, back, left, right—often in one automated run. That means the spindle (the part holding your drill bit) is rotating at different speeds depending on the wood type, bit size, and hole depth. Pick a speed that’s too slow, and you’ll end up pushing the bit through the wood instead of letting it cut cleanly, which can tear out the edges of the hole. Too fast, and you’ll overheat the bit, dull it fast, or even cause the wood to scorch, especially on soft woods like pine or MDF.


If you’re new to multi-sided machines, you might be working with a mix of manual adjustments and automated controls. Even if you have a CNC model, the base speed settings still need tweaking. For example, our customers often ask about the difference between a Six Sided Boring Machine (great for solid wood) and a CNC Drilling Machine Wood (more precise for custom cuts), and both have different speed sweet spots. Let’s walk through the step-by-step process, no fancy jargon required.
Step 1: Prep Your Workpiece and Tools First (Don’t Skip This!)
Before you even touch the spindle speed settings, you need to gather the right materials. That means knowing what type of wood you’re working with—softwoods (pine, cedar), hardwoods (oak, maple), man-made boards (MDF, plywood), or even composite materials. Each has a recommended speed range, and messing this up is the #1 mistake new operators make. You also need the right drill bit: twist bits for straight holes, forstner bits for flat-bottomed holes, or brad point bits for clean edges. The bit size is non-negotiable too—smaller bits (1/8 inch, 3mm) need faster speeds, while larger bits (1 inch, 25mm) need slower speeds to avoid overloading the spindle.
Pro tip from the shop floor: If you’re switching between wood types mid-project, test a scrap piece first. Cut a small section of the same material, set a test speed, and check the hole quality. This saves you from ruining a full workpiece later.
Step 2: Access the Spindle Speed Controls (Manual vs. CNC Models)
The controls for adjusting spindle speed depend on what kind of six sided machine you’re using. If you have a basic, non-CNC model, the speed is usually adjusted via a dial or lever on the machine’s main panel. Older machines might use a belt and pulley system—you’ll loosen the belt, slide it to a different pulley size, and retighten to change speed. If you’re working with a Six Sided CNC Drilling Machine, the speed is changed digitally through the machine’s HMI (human-machine interface) screen—no tools needed, just a few taps to input a new RPM (revolutions per minute) value.
Wait, what’s a good base RPM to start with? For softwoods, start at 3,000 to 4,500 RPM. For hardwoods, drop it to 2,000 to 3,000 RPM. For MDF, which is dense and prone to melting, stick to 2,500 to 3,500 RPM. That’s a general rule, but your test scrap will tell you if you need to adjust higher or lower. For example, if your test hole on pine has a tiny burn mark, bump the speed up a little—higher RPM means the bit cuts through the wood faster, reducing friction and heat. If the hole has splintered edges, slow the speed down, or switch to a brad point bit.
Step 3: Adjust Speed for Multi-Sided Operations (The Six Sided Specific Part)
Here’s where a lot of operators get stuck: when you’re drilling on multiple sides of a workpiece, the spindle might have to rotate at different speeds for each face, depending on the wood grain direction. For example, drilling along the grain (top to bottom of a pine board) lets you go a little faster than drilling across the grain (end to end). If your six sided machine is automated, most modern CNC Wood Drilling Machine has pre-programmed speed settings for grain direction, but double-check these before running a full batch.
Another thing to consider: hole depth. If you’re drilling a shallow hole (1/2 inch or less), you can run a faster speed, since the bit doesn’t have to work as hard. For deep holes (2 inches or more), slow the speed down. Deep holes generate more heat, and a fast speed can cause the bit to wander or break mid-drill. If you’re drilling multiple holes in a row, take a 10-second break between runs to let the spindle and bit cool down—this keeps the speed consistent and extends the life of your bits.
Step 4: Fine-Tune for Your Machine’s Specifics
Every six sided drilling machine is a little different, even if they’re the same model. Over time, your machine’s belts, bearings, and bits will wear, which can affect speed consistency. If you notice that your holes are coming out rough even after adjusting speed, check for wear on the spindle. For manual belt-driven machines, a loose belt can cause the spindle to slip, making the actual RPM lower than what you set. Tighten the belt slightly, then re-test the speed. For CNC models, run a speed calibration test every 3 months to make sure the digital display matches the actual spindle speed—electronics can drift over time, so this step is easy but often forgotten.
We see this a lot with customers who switch from a single-sided drill to a six sided boring machine (you can check out more details here)—they bring old habits of setting speed for single-sided work, and end up with messy holes on the other sides. The key is to remember that multi-sided drilling means the bit is entering and exiting the wood differently on each face, so speed can’t be one-size-fits-all.
Common Mistakes to Avoid
Let’s talk about the mistakes I see every day. First, not adjusting speed for bit size. A 1/8 inch brad point bit needs 5,000 RPM to cut cleanly, while a 1-inch forstner bit maxes out at 1,500 RPM. Using a fast speed on a large bit will put too much stress on the spindle, leading to vibration that damages both the machine and the workpiece. Second, ignoring wood density. I once had a customer who tried to drill ½-inch holes in solid oak at 4,000 RPM—he snapped three bits in an hour and had to replace the spindle’s bearing. Slow down on hardwood, trust me. Third, skipping the test scrap step. Even if you’ve used the same wood a hundred times, a new batch of MDF might be drier or denser than the last, so testing saves you from ruining a whole cabinet door.
When to Get Extra Help
If you’ve adjusted speed three times and still have issues—burn marks, splintering, or bits breaking—it might be time to check your machine’s maintenance. Worn drill guides, dull bits, or misaligned spindle axes can all mess with your results, not just speed. If you’re not sure how to calibrate your CNC model or replace a worn belt, our team can walk you through it, or help you find the right settings for your specific project.
At the end of the day, adjusting spindle speed on a six sided drilling machine is all about balance—balance between speed, bit size, wood type, and workpiece size. It’s not a science that’s set in stone, but with a little testing and attention to those details, you’ll get clean, consistent holes every time.
If you’re in the market for a new machine or need help troubleshooting your current setup, we’re here to help. Reach out to our team to chat through your specific needs, whether you’re a small cabinet shop or a large furniture manufacturer. We can walk you through which machine works best for your projects, and share pro tips to keep your operations running smoothly.
References
- Woodworking Network. (2022). “Spindle Speed Fundamentals for Woodworking Machines.” Retrieved from woodworkingnetwork.com
- Machinery Lubrication. (2021). “Maintaining Spindle Speed Consistency in Multi-Head Drilling Equipment.” Retrieved from machinelubrication.com
- American Wood Council. (2020). “Recommended Cutting Speeds for Woodworking Tools.” Retrieved from awc.org